
With the sun making it’s way back and being closer to the earth it creates those longer days that we all have been waiting for. You don’t feel like you’ve been living under a rock or a cave with limited light. There is a bit of excitement in the air with the birds chattering more and I noticed geese were returning. Feel like it will be an early spring for us here in the north. Depending on where you live some may already be seeing the signs, such as the crocuses and daffodils poking their fresh green stalks up through the dirt, while others of you already have full flowers in bloom (yes I’m jealous). These are such welcomed visions as we know the season is finally changing and the harsh winter is behind us. Easter is just around the corner. The ever popular Easter lilies and spring tulips have already started to filter into the stores. Recently I was walking past a display in the store, I stopped, backed up and just had to take a moment to breath in the distinct aroma of that pretty purple hyacinth sitting on the stand. (I wrote this before we had the Covid-19 outbreak and it has changed our world so quickly, I do not take for granted even these small moments of freedom that we formerly had to just browse in the store and not be quarantined in our homes). I am glad that I can offer a home project that most of you may already have the needed supplies on hand. No need to go to a store.
Easter has always meant family time for many. Since I was a child the one thing I looked forward to the most was coloring Easter eggs. Back then the creativity of this was to take a white crayon, make a design or write your name before dipping it into the prepared colored vinegar bath. My fingers always looked like a masterpiece by the time I was finished. Yep, a masterpiece of blue, purple, yellow, green and hues of pink, which inevitably was supposed to be red but could never seem to put enough color for it to take to the egg.
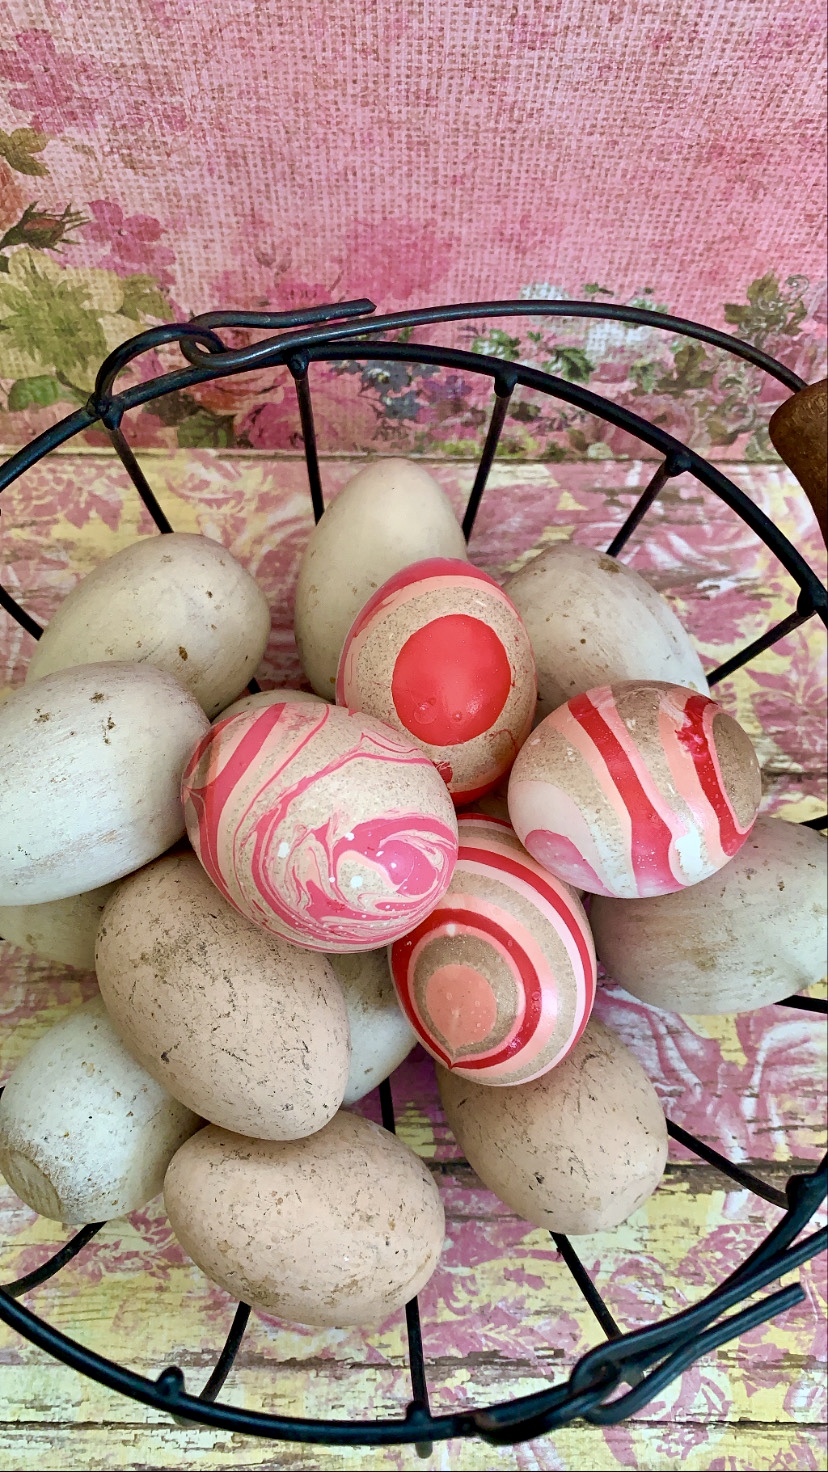
This year I wanted to try something a little different. When I started thinking of ways that I could up the game from the usual coloring, stickers or plastic egg wraps I wondered if it would work to use nail polish. I know there are other projects out there where ceramic mugs can be used and nail polish is put in a dish of water and then the mug is dipped into that, thus adhering the nail polish to the ceramic. In fact I had received one as a Christmas present one year and thought it was so gorgeous.
Nail polish is one item that most of us probably have on hand therefore making this very cost effective. Below I will lay out what you will need and how to steps so that you can have some “eggcellent” results with this project.
Items you will need for this project:
- One Pyrex or other glass bowl that is about 6 inches in diameter and 3 inches deep.
- Hard boiled eggs (Recipe Below)
- Nail polish 3-5 colors is perfect no specific brand
- Toothpicks
- Paper Towels
How to color the Easter Eggs with Nail Polish:

I will walk you through the process and what worked best for me. Doing circular shapes on your eggs is the easiest. You can add some interest to your eggs by using a toothpick to draw the nail polish out to the sides thus creating some patterns. Be creative, don’t be afraid to try some unique patterns. If you don’t like what you have, you can simply start over. I took quiet a few photos to make this as easy as possible. I did find that some of the nail polish stuck to my bowl by the time I was done but I was easily able to remove it with a scouring pad. I would recommend this for kids about 6 and older, but you be the judge. If you have creative tweens or teens they will love this. Seems our new normal is to communicate via media platforms. Take advantage of this and FaceTime a friend to do the project together with their kids and your kids. Or just be a big kid and color the eggs yourself, just because it is fun. I would love to see your finished products. Leave a comment and attach a photo.
- Put water in your Pyrex bowl about 1/2 inch from the top.
- Add one drop of nail polish at a time. You will see it spread out to the sides of the bowl as soon as it hits the water. As you add each drop you will have less of a spread as it makes rings. I recommend that you are close to the water when adding the drop of nail polish. Alter colors for desired look.

3. If you want to do a design take your toothpick, place it in the middle of the bowl and pull the polish out to the sides. Work quickly as the nail polish will start to form a hard layer on top of the water and you will not be able to manipulate the design.

If the design is not what you want you can simply take the toothpick and swirl it around to gather all the nail polish and then remove it onto one of your paper towels and start over.

4. Once you have desired pattern slowly drop the egg into the water until fully submerged. The nail polish will wrap around the egg and adhere to the shell. You can move the egg around In the water to adhere any leftover nail polish to make it complete or pull excess off with the toothpick.


5. Remove the egg from the water and allow to dry on the paper towel or lightly pat dry so it doesn’t stick to the paper towel.
6. Happy Easter Egg creations.


Hard Boiled Eggs in the Instant Pot for perfect Easter Eggs
Ingredients
- 12 eggs
- Water
- Ice
Instructions
- Put the trivet in the bottom of the Instant Pot or the wire basket. Layer the eggs on top of each other.
- Add 1 cup of water, close the lid and select manual high pressure for 6 minutes.
- Prepare ice bath with water and ice for the eggs.
- As soon as the eggs are done do a quick release on the Instant Pot.
- Add the eggs to the ice bath for about 3 minutes
- Remove and pat dry with towel.


Leave a Reply